

Introduction
If you happen to have developed a predilection for gadgets, you may be struggling to resist the temptation of home automation. In an IoT (Internet of Things) era, there's a never-ending production line of eye-catching gizmos that we never knew we needed. Colour-changing light bulbs that flash when your football team scores a goal, fridges that alert you when you're low on milk, and fitness trackers that tell you when you've had a good night's sleep.
It's a whole new world of toys, but some are more useful than others, and the one that purports to be most advantageous is the smart thermostat. You've probably seen them advertised on TV, and if you believe the hype there are plenty of reasons to have one: smart thermostats are easy to install, they let you control your heating from afar, they look cool and, better still, they claim to shave hundreds of pounds off your energy bills. Who wouldn't want one?
For your's truly, the temptation proved too strong to ignore, and following a recent home refurb, I now have seven Heatmiser Neo smart thermostats installed throughout my home and, following a few months of use, plenty of thoughts to share.
Why Heatmiser Neo?
First, a little context. My home's central-heating system had never proven entirely comfortable. The 2006 property is narrow and spread over three floors, and despite constant fiddling with the radiators, the house would always feel cool downstairs and too hot upstairs.
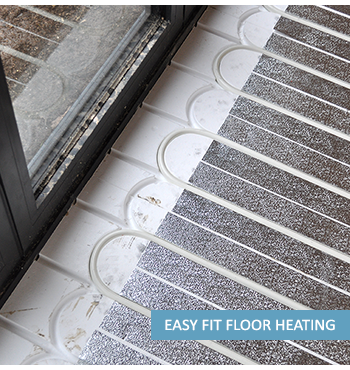
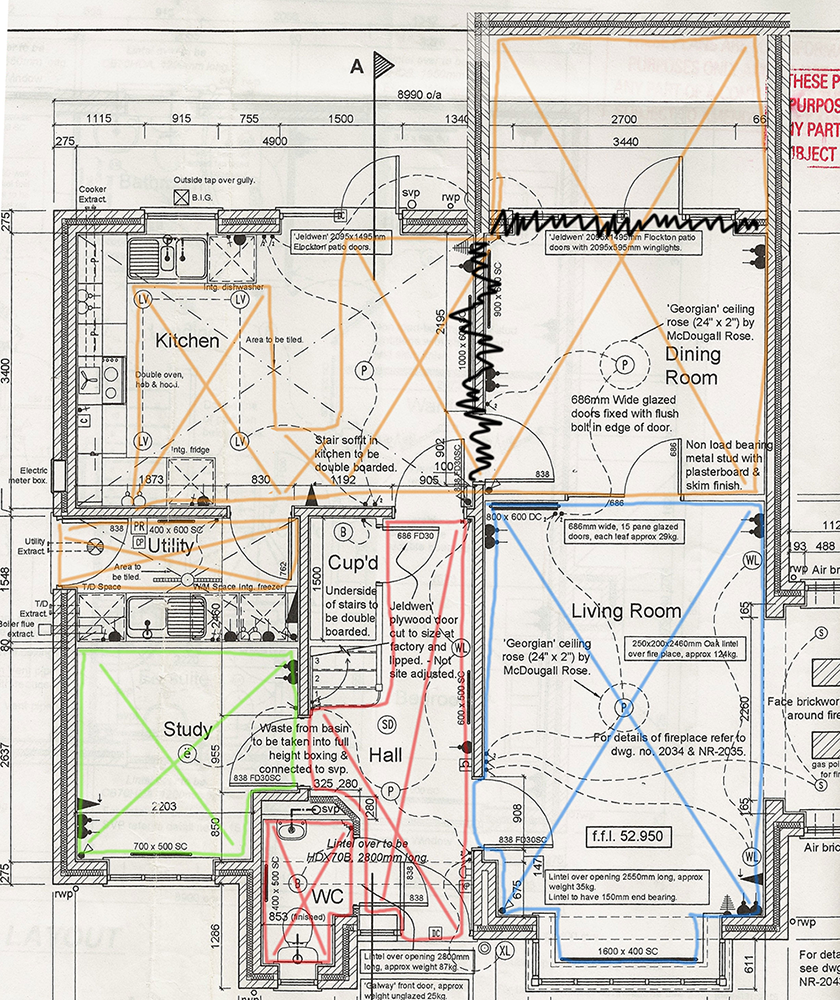
So when we decided to bring down the wall between the kitchen and dining room, improving the heating was high on our list of priorities. Then one thing led to another. The wall being removed was home to the two radiators in that part of the house, and without having an easy way to relocate them, we decided to retrofit a wet underfloor heating system from Easy Fit Floor Heating, formerly known as Wundafloor, on the entire ground floor. That was fun.
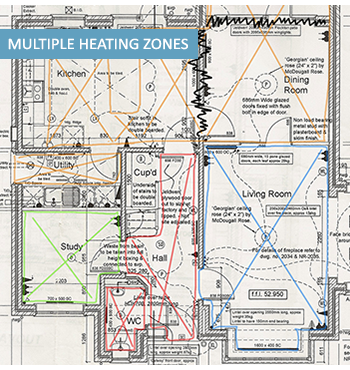
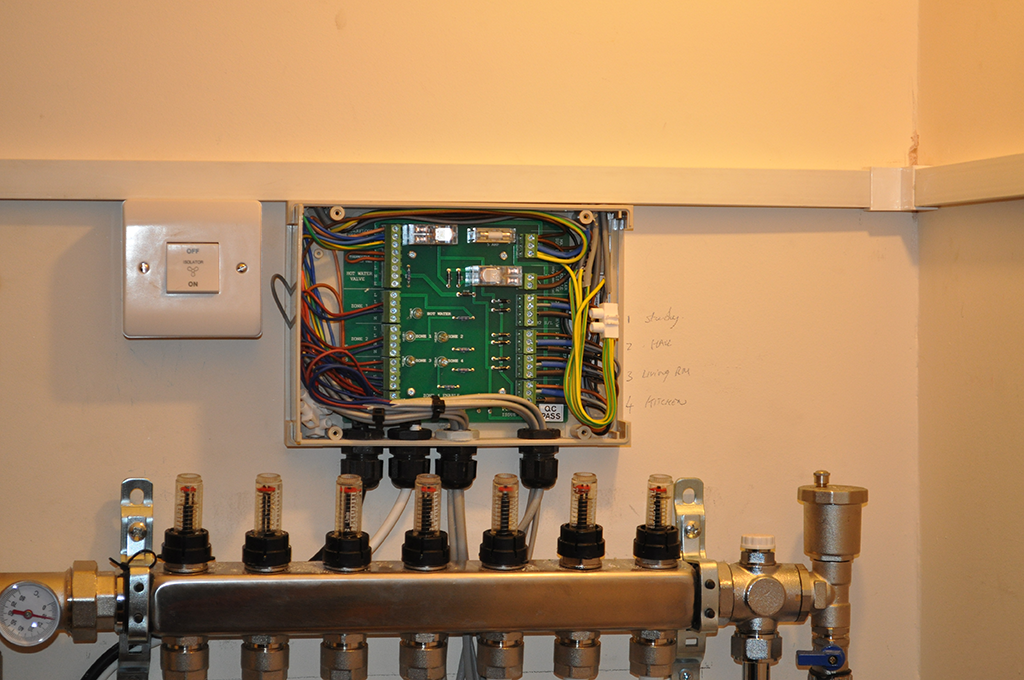
Cutting a long story short, we have been able to create four ground-floor zones (kitchen/living room, hallway/cloakroom, front room and study), while branching-off the first and second floors as two additional zones. The ground floor utilises the new underfloor heating whereas the upper floors make use of existing radiators, and all six zones are fed by a system boiler in the utility.
Got all that? Now, the idea is to be able to heat each zone independently, as warming the rooms you're using should in theory be more efficient than heating the entire property. In order to do so, we required six thermostats for the heated zones and a seventh to program the hot water.
There has been an explosion in the number of smart thermostats to choose from in recent years, and some of the high-profile options you've probably heard of include Nest, Hive and Tado. But back then, few systems supported multi-zone configurations, and if you have a need for multiple thermostats, price becomes prohibitive. A single Nest thermostat fetches £180 at retail, so you can imagine our reluctance to buy half a dozen.
That's where Heatmiser Neo comes into play. Created by a UK-based outfit and designed with zoned heating in mind, a Neo thermostat - or neoStat for short - can be installed in individual zones and configured to switch independent zone valves. Up to 32 rooms are supported (way more than I'd ever need), and each neoStat communicates wirelessly to a web-connected neoHub.
The neoHub provides the online functionality, but when it comes to incorporating your heating, each neoStat is designed to be wired to your boiler, heating valve or wiring centre, so there's thankfully no need to faff about with batteries. And to top it all off the thermostats can be controlled via apps available for Android, iOS and Windows Phone.
Installation and First Impressions
In order to take advantage of the web-based functionality, the Heatmiser Neo system requires at least two components: a neoHub (£130) and a neoStat (£69). The two requisite parts are also available in a neoKit 1 bundle (£199) and, if you intend on incorporating your hot water timer, the neoKit 2 (£264) includes an additional hot water programmer worth £69.
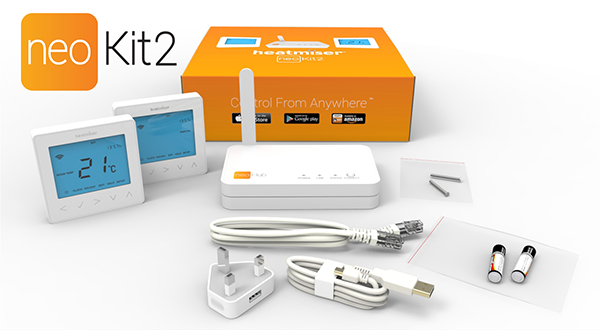
Making use of an online promotion, I picked up the neoKit 2 and five additional neoStats at a cost of just over £500 from The Underfloor Heating Store. A heck of a lot of money, but there was no turning back at this point.
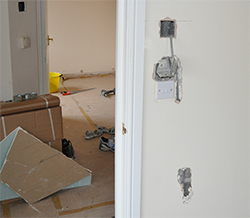
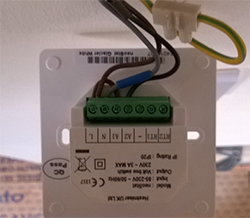
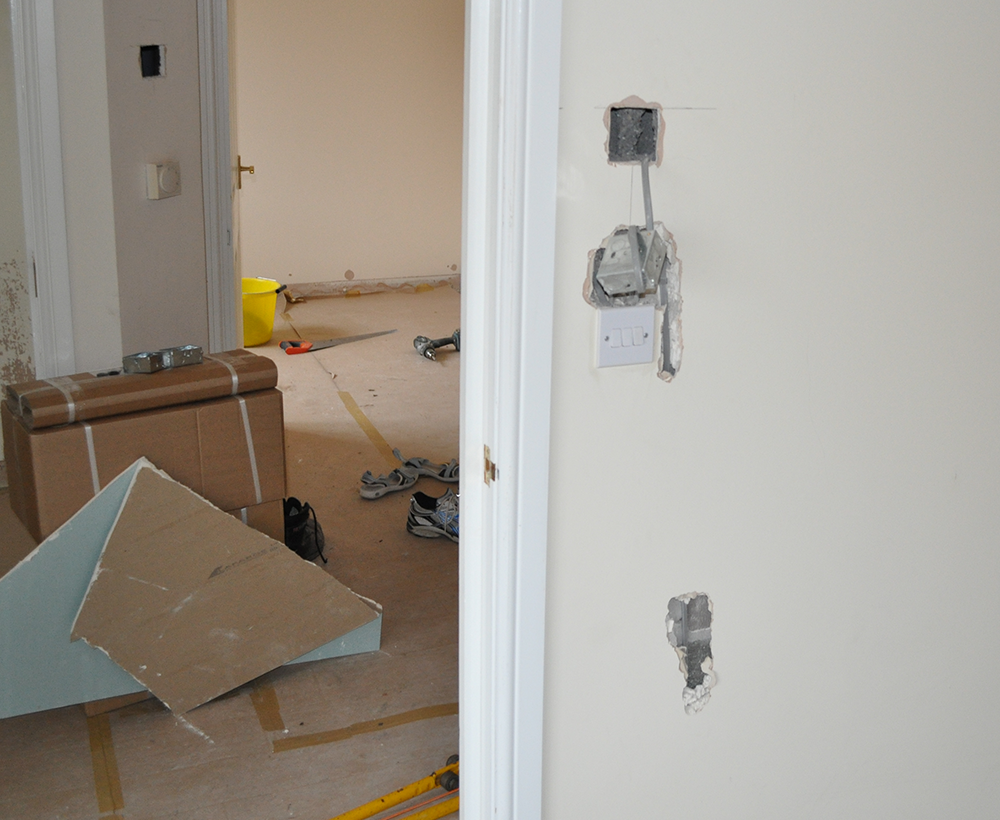
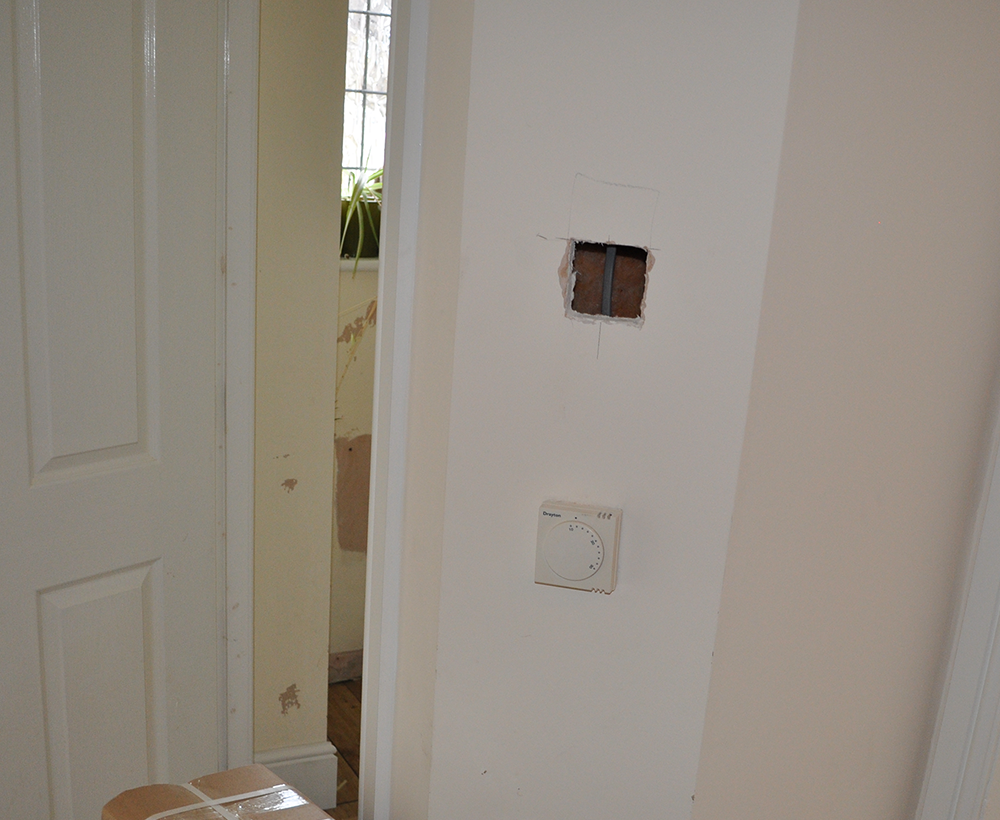
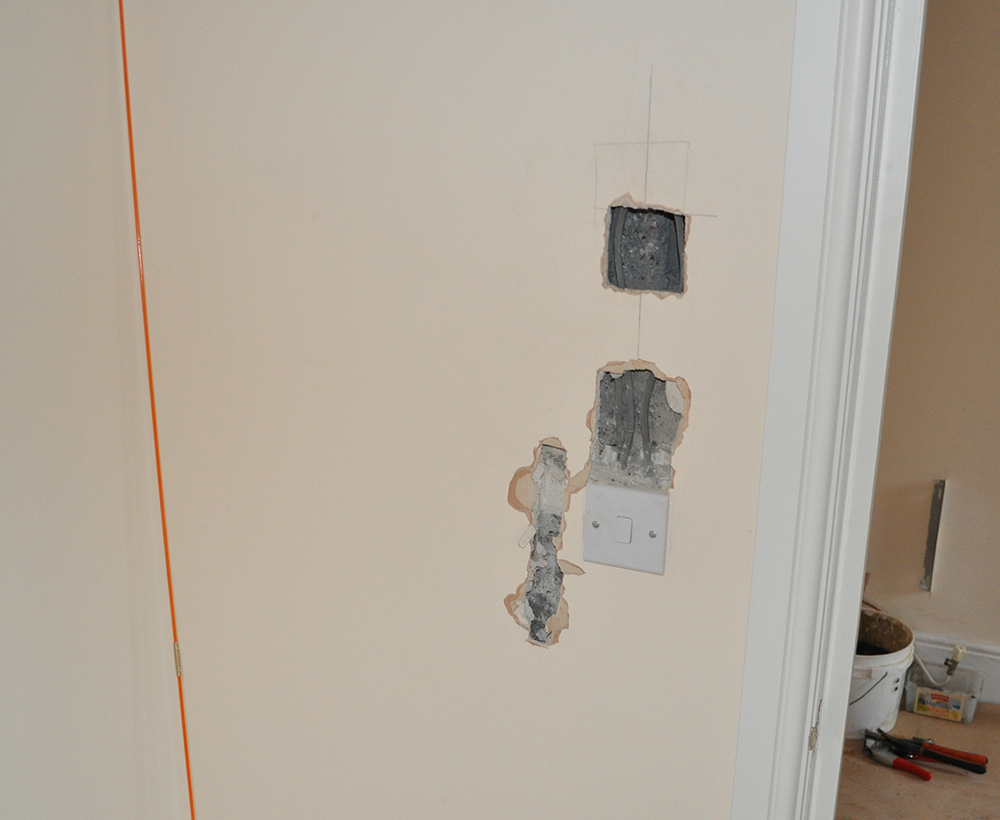
Now, I could pretend that I revamped my entire home heating system using nothing but brawn and DIY know-how, but I'll be honest: the electrician and plumber did most of the work while I made the tea. I couldn't tell you exactly which wire goes where, so I'll take the easy way out and refer those of you seeking more explicit detail to the official manual - wiring diagrams are on pages 28-31.
The trickiest bit, as far as I could tell, was routing the cables from the wiring centres to the individual thermostats. This wouldn't be a problem in a new-build or a retrofit where old thermostats are being replaced - neoStats allow you to use the existing stats' wiring - but adding thermostats to rooms that didn't have them previously requires channelling a fair few cables.


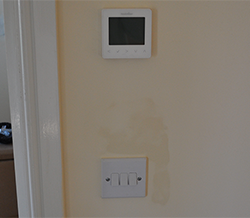
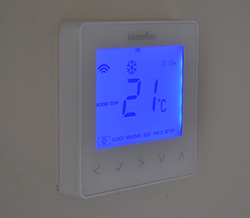
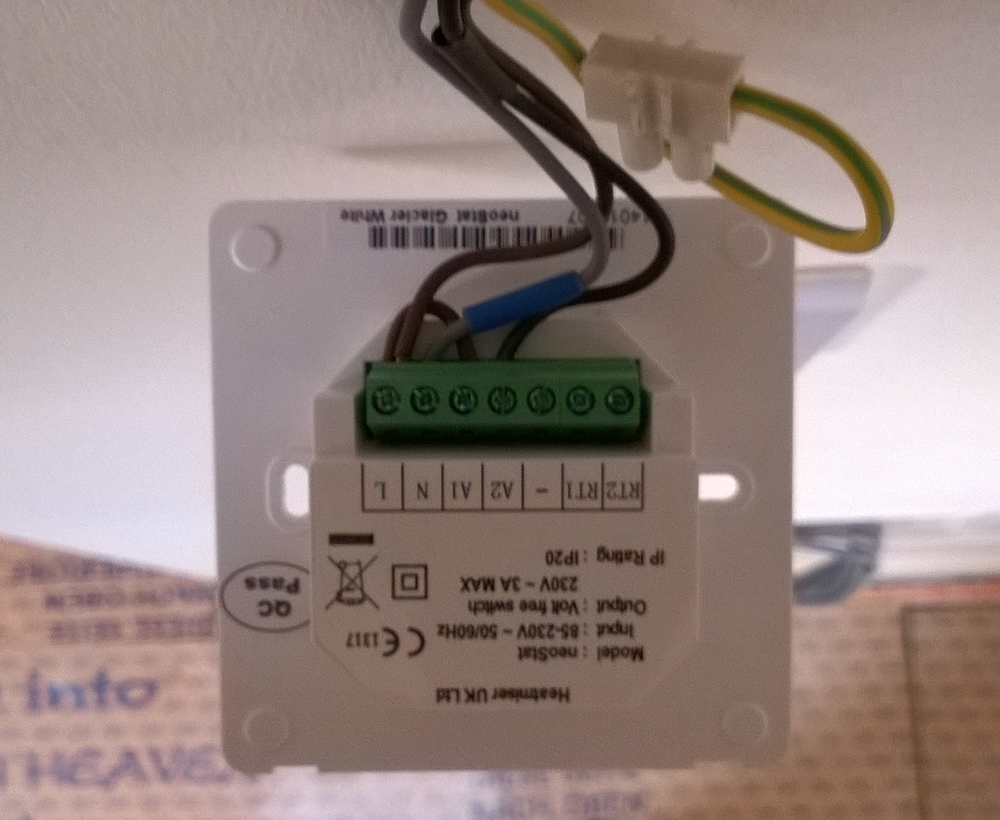
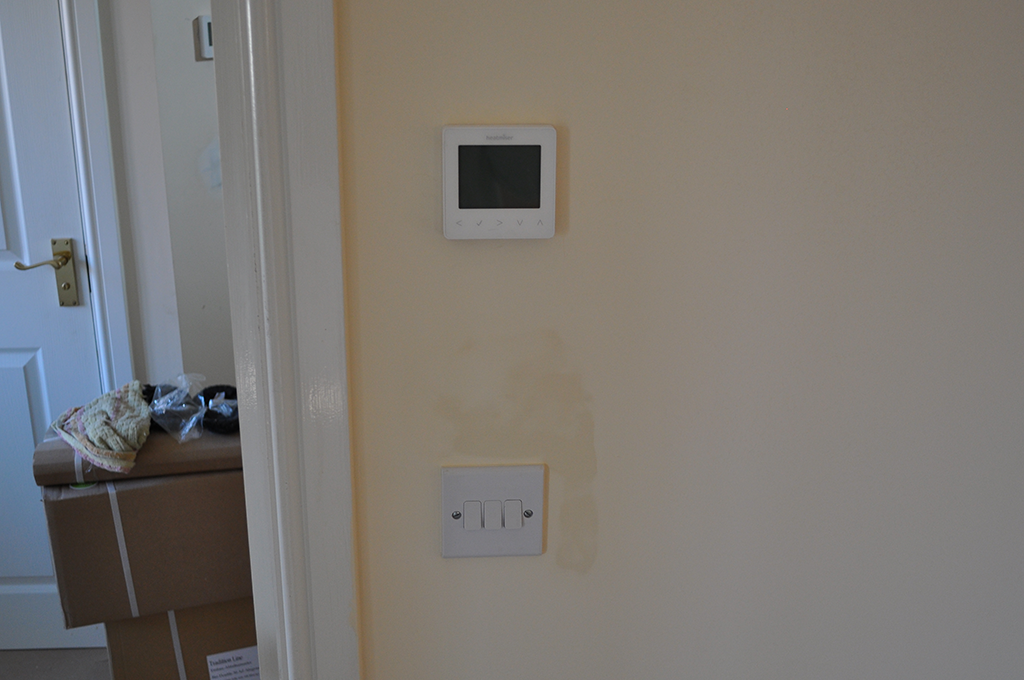
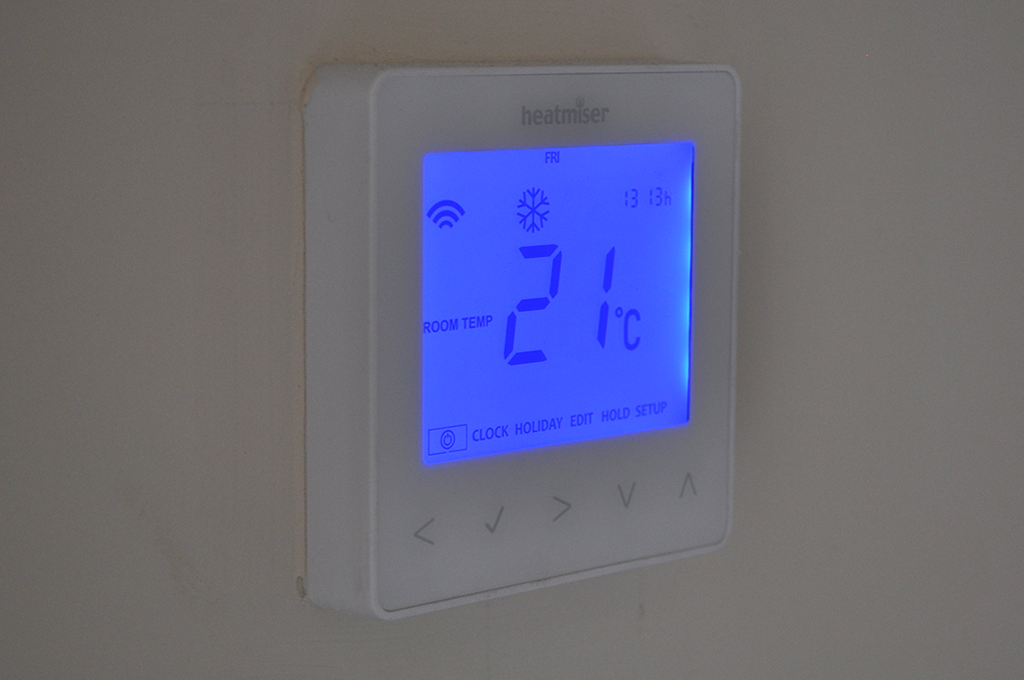
Half-a-dozen thermostats, a hot-water programmer and two wiring centres later, and we're up and running. First impressions are good, as the neoStats are stylish yet sleek enough to sit naturally alongside regular light switches. The thermostats are available in a choice of Sapphire Black, Glacier White (pictured) or Platinum Silver colour schemes, and at 85mm x 85mm x 15mm in size, they don't jut out too far from the wall.
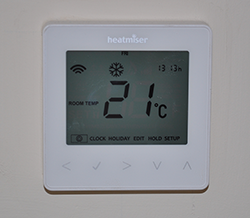
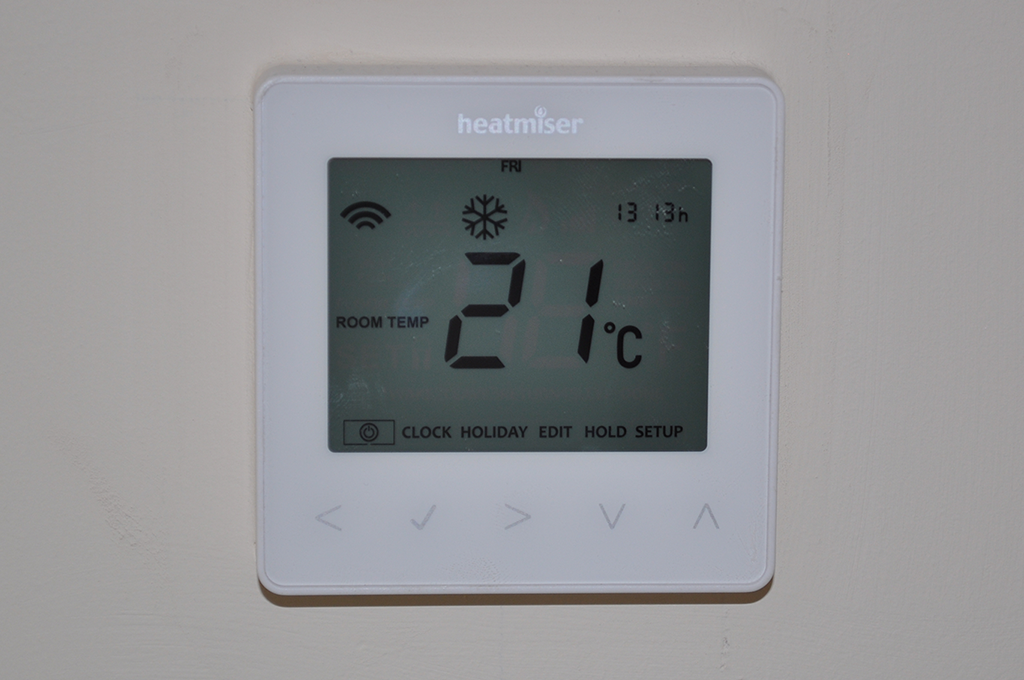
The blue backlight is a nice touch (it's activated for a short while whenever you touch a button), and it's handy to have both the temperature and the time on display, though the latter could have been bigger in size. You need to go up close to actually make out the time, and even then my father-in-law needs to don his glasses in order to read the smaller fonts.
It's also interesting to note that the temperature is displayed only as a whole number. In order to get a more precise reading you need to refer to the associated apps, all of which will give temperature to within one decimal point. The reading incidently is taken by a small sensor at the base of each thermostat, so it's a good idea not to install it close to any heat sources and Heatmiser recommends keeping it "at eye level." This is the standard configuration, though an optional floor-sensor is also available and can be used to regulate the thermostat using ground temperature rather than air temperature - useful if you're looking to protect, say, a wooden floor covering.