|
Fitting is slightly more involved than a heatsink that uses the standard P4 retention mechanism but anyone familiar with an Alpha 8045, 8942 or a Swiftech MC or MCX air cooler will know the drill. To get access to the four mounting holes round the socket area you need to remove the retention cage.
On the test motherboard, an ABIT IT7-MAX, this was easy with a steady hand and a pair of small pliers to wriggle the white fastening pins free and finally to squeeze the legs of the cage through the holes in the motherboard and finally all the way free, leaving a very bare looking IT7 to mount the MCX4000 to.
Unlike regular coolers that will make use of the retention mechanism, you must remove your motherboard from your case at least for the first fitment.
Next up you have to fit the four aluminium standoffs, placing them into the freshly uncovered holes with a nylon screw washer to hold them in place from the back side of the motherboard. Swiftech recommend a dab of super glue on the nylon washer if you'll be using the MCX4000 (and indeed the MCX478) as your main heatsink, just to hold the washer and standoff in place.
In this reviewers experience, both with the MCX4000 and MCX478, the standoff does have a tendency to lock to the screw and then move around when you try to remove the screws to take the heatsink off so the advice is sound if you tend to keep the heatsink for some length of time on the same motherboard.
Next up, place your freshly coated CPU into the socket (I used Arctic Silver 3 as the TIM for all the tests) and with the motherboard flat, line up the MCX4000 over the standoffs. Next up, take the 4 #6-32 Philips screw and spring combos, placing them in the holes over the standoffs. Finally, screw the 4 screws against the springs until they 'take' into the standoffs and the sink is held to the motherboard under the influence of the standoffs. Then it's a matter of screwing the screws down a little at a time so you pull the four corners of the sink down at the same rate until the screws are finger tight in the standoffs. Over tightening isn't recommended, just a finger tight lock into the standoff is all that's recommended.
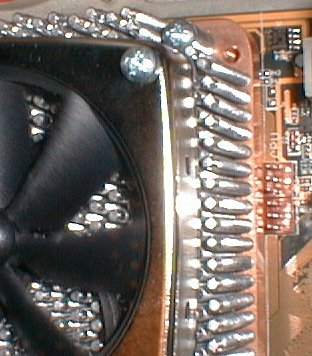
A quick peek under the sink to check the contact with the CPU and I was done. Due to the size of the sink, I had issue fitting it onto the IT7-MAX. It was fine to fit, but it blocks off the use of 2 fan headers that usually lie outside of the stock retention cage. Here's a shot to illustrate, taken from my own machine.
You can see the reflection of the 3 pins on each fan header clearly in the copper base of the sink, showing you how close they are. It's impossible to use those headers now on my motherboard with the MCX4000 fitted, so watch out for similar issues on other motherboards.
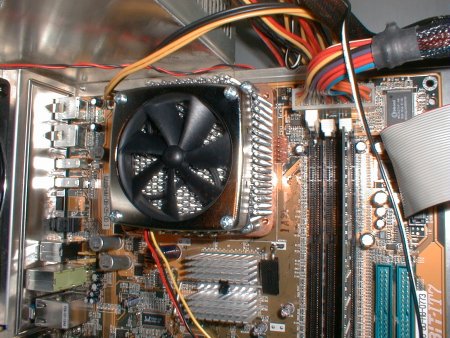
Installed in your case, the MCX4000 dominates visual proceedings. Excuse my slightly messy case wiring :)
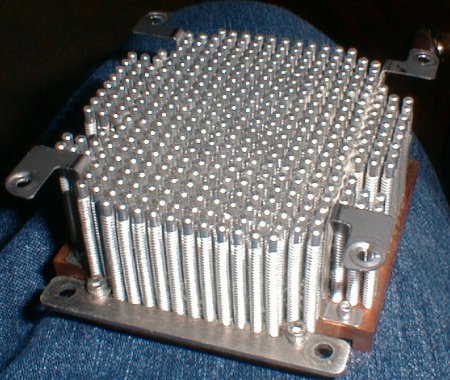
Finally a picture of my MCX478 sat on my knee for reference. Note the fewer pins and smaller dimensions when compared to the new MCX4000.
|