How to Build a Baybus
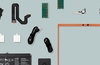
1) Measure and mark out blanking plate, obviously if you want it to look anything like, you’re going to have to use a rule I tend to like to make things pretty much even, so I measure the plate, approximately 155mm, subtract the width of the Temp. Module, then divide this by how many gaps you going to want (5 switches plus temp mod = 7 gaps) this way, hopefully things are going to look nice and even. 2)
Using a small drill as a pilot drill, perhaps 2-3mm, drill all holes for
LED’s and switches, if possible try and use a pedestal drill with vice, as
this is going to offer a lot more accuracy than a hand drill.
2)
Using a small drill as a pilot drill, perhaps 2-3mm, drill all holes for
LED’s and switches, if possible try and use a pedestal drill with vice, as
this is going to offer a lot more accuracy than a hand drill.
 3)
Once all pilot holes have been drilled, it makes it much easier to drill
the holes to the size required, IIRC the sizes for me were 7.5mm for LED’s and
6.5mm for the switches. Also at this stage, I drilled 4 large holes in each
corner of the area that needed to be cut out for the temp.module.
4)
Next step is to actually cut out the square hole for the
temp.module…there are various ways of doing this, but I did it with a junior
hacksaw. After taking the blade out of the junior hacksaw, I put the blade
through one of the 4 corner holes, then I was able to re-attach the blade to the
saw itself. This way I was able to saw from corner to corner and cut out a rough
square of material to be removed, obviously not going over the lines that had
been drawn as a guide. The cutout was then finished off to size with a small
file.
5)
All the LED’s and switches can now be fitted prior to wiring. The
temp.module can be left out as this will only get in the way.
3)
Once all pilot holes have been drilled, it makes it much easier to drill
the holes to the size required, IIRC the sizes for me were 7.5mm for LED’s and
6.5mm for the switches. Also at this stage, I drilled 4 large holes in each
corner of the area that needed to be cut out for the temp.module.
4)
Next step is to actually cut out the square hole for the
temp.module…there are various ways of doing this, but I did it with a junior
hacksaw. After taking the blade out of the junior hacksaw, I put the blade
through one of the 4 corner holes, then I was able to re-attach the blade to the
saw itself. This way I was able to saw from corner to corner and cut out a rough
square of material to be removed, obviously not going over the lines that had
been drawn as a guide. The cutout was then finished off to size with a small
file.
5)
All the LED’s and switches can now be fitted prior to wiring. The
temp.module can be left out as this will only get in the way.
 6)
There isn’t much point in me doing a wiring diagram, suffice to say
that I didn’t veer much from any of the wiring diagrams that can be found on
the net e.g. good ones can be found here http://www.virtualhideout.net, all you
need to bear in mind is that your LED’s may be a different voltage to the ones
in any wiring diagram you choose to use, hence you need to work out different
values for your resistors.
6)
There isn’t much point in me doing a wiring diagram, suffice to say
that I didn’t veer much from any of the wiring diagrams that can be found on
the net e.g. good ones can be found here http://www.virtualhideout.net, all you
need to bear in mind is that your LED’s may be a different voltage to the ones
in any wiring diagram you choose to use, hence you need to work out different
values for your resistors.
 7)
Only thing I can really say about wiring the thing up is try and think
about what you’re doing before you set off, a lot of time can be wasted by
doing things that don’t need to be done. Also try and use rubber sleeving
and/or heat shrink sleeving to insulate all solder joints.
7)
Only thing I can really say about wiring the thing up is try and think
about what you’re doing before you set off, a lot of time can be wasted by
doing things that don’t need to be done. Also try and use rubber sleeving
and/or heat shrink sleeving to insulate all solder joints.
 8)
All my fan connectors were terminated with the standard Molex, ‘hard
drive’ type connectors, I sourced these from Maplins along with all my other
stuff, although any type of connector you can lay your hands on will do as long
as you don’t mind cutting off the Molex connectors that are likely to be on
your fans
8)
All my fan connectors were terminated with the standard Molex, ‘hard
drive’ type connectors, I sourced these from Maplins along with all my other
stuff, although any type of connector you can lay your hands on will do as long
as you don’t mind cutting off the Molex connectors that are likely to be on
your fans
 9)
A nice tip for making ‘professional’ looking twisted cables, for the
output to each fan, is to get the wire for each connector (in my case about 1m
of 0.5mm cable x2 for each connector) place one end of these 2 wires in a vice
and the other end in a drill. Then slowly turn the drill; it helps if your drill
has speed control
whilst pulling slightly on the wire to stop it from coiling up. Once finished
you may find that your wire still has a tendency to coil up, this can be
overcome by tugging a little bit more on it to ‘stretch’ the kinks out of it
and encourage it to remain straight. Most wire will stretch a fair bit before it
even approaches the point of breaking, but obviously take care not to stretch it
too much, as it may break internally, yet the insulation is still intact.
9)
A nice tip for making ‘professional’ looking twisted cables, for the
output to each fan, is to get the wire for each connector (in my case about 1m
of 0.5mm cable x2 for each connector) place one end of these 2 wires in a vice
and the other end in a drill. Then slowly turn the drill; it helps if your drill
has speed control
whilst pulling slightly on the wire to stop it from coiling up. Once finished
you may find that your wire still has a tendency to coil up, this can be
overcome by tugging a little bit more on it to ‘stretch’ the kinks out of it
and encourage it to remain straight. Most wire will stretch a fair bit before it
even approaches the point of breaking, but obviously take care not to stretch it
too much, as it may break internally, yet the insulation is still intact.